Wednesday, May 31, 2006

RoHS & MOTM (UPDATED June 3rd)

Whats this?

RoHS is a new European legislation aimed ad banning harmfull substances (lead, mercury etc) in electronic products, as of july 1st 2006. See http://www.rohs.gov.uk/
Currently , all kits by Synthesis Technolgy come with solder by Kester, and is currently not RoHS compliant.
In order to continue shipping kits, Synthesis Technology will ship it's kits to the EU without solder, unless it can find RoHS compliant solder to use.
Solder is available in many qualities, and the solder used so far, is very reliable, and lasts a long time, a reason why it was used.
The assembled modules are currently made with the same solder, and if Synthesis Technology cannot find a suitable solder it will be forced to stop shipping assembled modules to the EU. Hopefully a better solution will be found (research into wave soldering is done) which will be good, but mayl raise the price for assembled modules.

Currently I am researching replacements for the Kester solder types needed here in the EU, as soon as I know of good solutions, then I will post it here.

UPDATE:

Kester types and their part numbers recommended by Synthesis Technology are.

For 331 (the organic flux type)

24-6337-6401

For 245: (the No Clean type)

24-6337-8800

However I have not found a EU supplier for these parts yet.
Saturday, May 27, 2006

Case design part 2.

Having contacted some people on the MOTM users list, I received some info from Dave Fulton, band member of Dweller at the Treshold .
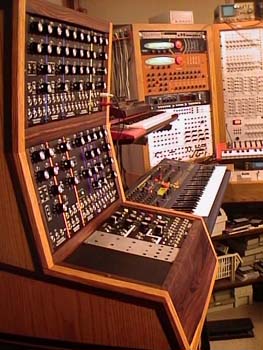
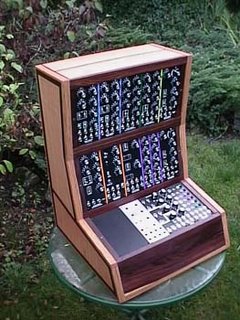
Below are some pictures of his beautiful synth cabinet (oak with rosewood inlays), but I want to make them of solid walnut.
He wrote that they may be commercially available in due time, estimated costs are $400,- each (exl shipping).
Anyway, it's the case I am going to 'copy', I love it's design, has 19" rack space between the sides too, so my current synth incl brackets will fit perfectly.
Enjoy the pics, and be sure to visit Dave's site!


Oh, and this is how it looks with more than one of these cases side by side! I want one!!! No, TWO!!

Tuesday, May 23, 2006

Cabinet decisions


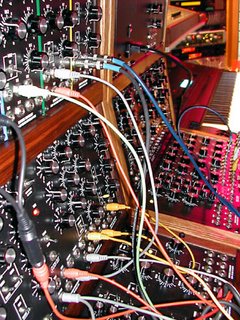
My MOTM synthesizer is starting to grow slowly now. As you can probably see from the pictures, I've got one set of 19" rack rails (available from Synthesis Technology ) completely full.
My next module is the MOTM-650 midi/cv which is underway and this means I need a place to put it.
Also, as Paul Schreiber rightfully pointed out, the synthesizer as is , is open on all sides. Having a child patching the synth is dangerous if the power would be on (don't worry, the synth was just resting on the floor , not plugged in as I was cleaning up the shelf it normally sits on).
So for safety and aesthetic reasons, I want to make a cabinet for it.
There are several options here, and I have been contemplating to put it in a 19" rack, I still have one laying arround.
However, I don't like the look of a 19" rack. Certainly not for an analog modular synthesizer like the MOTM I am building.
So I've decided to go for wood. I hope to get my hands on some real wallnut wood to make a cabinet out of.
Now what size and what shape to give such a thing?
At present I don't have a lot of space available so I will have to come up with a compact design. ( I innitially designed a 35 module monster synth, but I think I am having to scale down to approx 15 for now)
The 19" rack space is 5 2U modules wide, or 10 1U modules.
The 19" width is a usable width for me space wise, so I have decided to go for a 3 tier 19" wide wooden cabinet, which can house the current 19" rackrails, plus another 2 rows.
Now, I don't want to go for a square box, they look a bit boring. I am dubbing between a design shape like a Moog series 35 modular, be it narrower, or a VCS 3 shape, on which the bottom row of modules faces more or less upwards (but slanted), and the top two rows are facing forwards (but slanted). The last design is a bit less high than the other, but has perhaps the disadvantage that patch cables have a tendency to lay on top of the controls instead of hanging in front of them, which will make playing /operating the synth harder.
The Moog cabinet style, will be taller but doesn't have the problem of patch cables getting in the way as much.

So this is the dillema I am facing at the moment, if anyone out there reads this, and wants to share their tips or experiences, feel free to leave a comment below or drop me an e-mail via the MOTM users group at Yahoo.

Saturday, May 20, 2006

You can't start too early


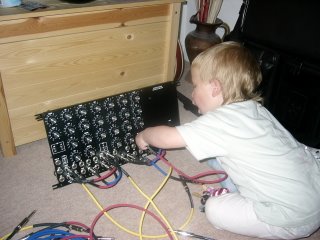
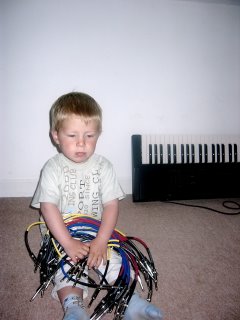
Age 3, patching in cables into my humble MOTM synthesizer, when daddy isn't looking for a minute. But I can't tell him of for that, I joined in instead. :-)
I hope my system will be growing steadily in the next few years, so that he can patch to his hearts content.

Friday, May 19, 2006

Calibrating at the dining table


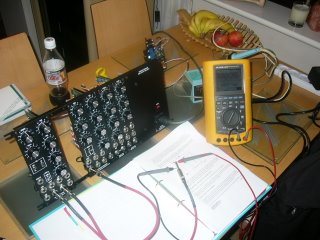
Two nights ago, I dragged my Motm to the diningroom table, got my manuals together, and set about calibrating some of the modules.
MOTM 300, MOTM 420 and MOTM 190. VCO, VCF VCA (in case you wondered).
Now that I have some patch cables I was able to get some of the calibration done, although I still need to calibrate the V/Oct signals.
I am fortunate enough to be in the possesion of a very good DVM (digital volt meter, although it should be able to measure more than that, so multimeter is a better description) , namely the FLUKE 867B graphical multimeter. It's a DVM with a large screen, that can also function as a simple oscilloscope. This proved helpful in tweaking the sine wave shape of the VCO, although it was near perfect to start with.
I also had a look at the other waveforms the MOTM 300 produces, and they are all very well shaped, no artifacts etc, just clean stable signals.
The filter and vca were also easy to do, provided you have the right tools of course. The calibration is very straight forward, but no rush job. Just as when building a module, you should take care and be patient when calibrating, it will pay of in sonic pleasure later! A good DVM is a basic requierment in my opinion, and get a proper calibration screwdriver/trimmer (usually made out of non conductive, antistatic plastic) from your electronics supplier.(Newark , Farnell , RS etc) . Any small watch maker screwdriver set works too, but a dedicated calibration tool is better.
Also I advise you to calibrate the modules seperated from your cabinet or rack, lay it flat on the table, (such so that the power supply cable can reach (it is sometimes easier to take out the power supply for that reason too, but be carefull for the mains voltages present on that module!!!) . You then have a stable surface for the module, and can calibrate more acurately.

I was done in about 30 minutes with all 3 modules. Tried out a few patches (the VCO outputs a signal when no CV signal is present too, and frequency is fully adjustable with the course and fine pots, and wow, the MOTM 300 does have quite a range, I was just tweaking and noticed the DVM indicate a frequency of more than 14kHz, and it could go higher still, one hell of a VCO, it can even create synth music for bats! :-)

Wednesday, May 17, 2006

Patch cables


This morning, the parcel I mentioned in an earlier post arrived.
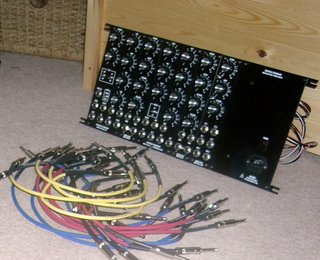
It contained my patch cables that I ordered from Stooge Industries.
The cables are what is promised, good quality, great finish and with logo. Great stuff.
I inserted some of them in the modules I have, and they slot in with a reasurring fit and click.
This also shows the quality of the used switchcraft sockets on the modules.
The jacks on the cable are made by Rean, and feel sturdy. What I did notice was that some of the metal sleeves on the jacks were loose on arrival, but that was easily screwed tight. They probably had some bashing to endure during shipping from the US to here in the UK.

To start with I ordered 3 colors in 2 lengths. I need to get some experience still in making patches on the modular, and I am sure that I figure out a good method of using color codes etc to identify cables in an larger patch on a later stage. I will probably need longer cables and more colors in time, but I get going with these cables first.

If only my MOTM -650 midi/cv module had arrived yet (I've been told it will ship very soon), I am dying to put the MOTM 300 VCO through it's paces, and patch it in :-)


Oh yeah , my son loves them too ;-)

Tuesday, May 16, 2006

MOTM news.


Currently Synthesis technology is working on a new version of the proven MOTM 800 ADSR module. The MOTM -810 looping ADSR.
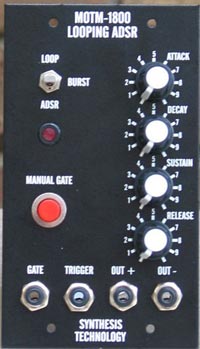
Although availability etc is not yet certain at this stage, I personally do not expect it to take too long before this module. Why? Because it is allready available as the MOTM 1800. This module is a Frac Rack compatible MOTM module (FracRack is a smaller design used by some other manufacturers). The Frac rack format modules (see photo) are exclusively available through the Analog Haven store in the US, are only available as ready build, No Kits.
Due to popular demand however, Synth Tech has decided to start offering this module in the original, large format too as the 810.
What is so special about a looping ADSR?
Well, as the name implies it is capable of looping. in other words, the ADSR envelope that you set up, can be looped with the push of a button, and repeated again and again. Therefore repeated again and again, it basically retriggers over and over, therefore you can adjust the enveloppe in realtime, and change it while it loops. See the picture of the 1800 below, expect the 810 to have very similar if not, the same features.

Imagine the new options here when you would patch it up and use as a kind of LFO signal, modulating a filter, a ring modulator, a VCO etc etc....

Monday, May 15, 2006

I'm Back :-)

I made it back, the kids had a great time , and lots of money spend, so I have to find another way to finance my little synth building hobby. :-)
Talking about money, I had the pleasure of a customs bill today, for a parcel that is stuck at their depot at the moment. The parcel contains some patch cables, (just 12 cables) and the charge is £30,-. Outrageous, but then again, what can I do. It's the first time I've been charged for anything, it may be because all other shipments so far have been kits, just a box with bits and pieces, which isn't realy worth charging in components I suppose.
Keep this in mind when you order parts from overseas. You could end up with unexpected extra charges.

By the way , If you are curious as to which patch cables I ordered, check out Stooge Industries.

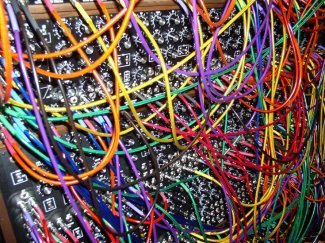
They make nice ones with the Synthesis Technology logo printed on it. Check them out. Perhaps once you will have a patch like the below picture. (taken from their site, sorry guys, but I thought you wouldn't mind a little free advertising :-) )

Sunday, May 07, 2006

Holiday time

Yep, I'm going on a short trip. Therefore this blog won't be updated for a week, as I wont have internet access while away.
but I won't leave you without any synth stuff.


So for now, here is a picture of another MOTM synth, that I found on the net.
In fact its a picture I found of Paul Schreiber himself (founder and driving force behind Synthesis Technology) , posing next to (his?) modular synth, in what looks like a trade show (NAMM?). Where and when was this Paul, and is this your system? :-)


For more about MOTM synths, go to Synthtech

More in 7 days from now :-)

Friday, May 05, 2006

MOTM 800 ADSR module kits builders take note!

There is a omission in the instruction manual for the MOTM 800 ADSR.
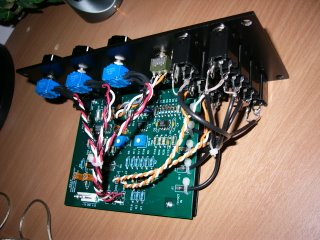
On the PCB's there are several through holes (holes that connect circuit tracks on one side of the PCB to tracks on the other side. ) On every other module in the MOTM range these holes need to be soldered through with the "organic flux solder' provided in the kit.
This is also the case for the MOTM 800, but some manual revisions do not have this in the instructions.
So before you start soldering on the parts that requier non clean solder (pots , wires etc), first solder all the remaining thru holes. There are not that many, and the module will probably work fine without doing it, but soldering them make it a much more reliable connection. I wrote Paul Schreiber from Synthesis Technology , and he confirms that they need to be soldered.
Aparently he was aware of the ommision and had corrected this in the past. However there seem to be some kits out there with manuals that do not have this correction, both my modules did not have it.

Happy soldering!

Thursday, May 04, 2006

MOTM-950 power connection board


Hi All,

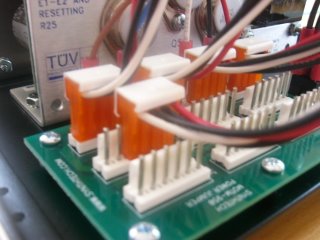
Thought I'd share a little tip with you today. If you opted for a MOTM 950 powersupply, you'll see that its connection PCB has a mix of 4 pin and 6 pin connectors.
The six pin connectors have an additional 5V and 0V pin for those newer modules that need this (the MOTM 650 midi/cv being one of them).
There are four 4 pin connectors on its board, and six 6 pin connectors.
Up to now I have 5 modules that requier the 4 pin connector, but there are only four of them on the connection board.

The solution is simple.
Just plug it on one of the 6 pin connectors, as the 'pin out' of this connector is near identical to the 4 pin, with the exception that the top two pins are the extra 5 V -0V supply. Just skip those and plug your 4 pin connector on to the bottom 4 pins of this connector.(Orientation is based on the way the power connection board of the 950 is mounted on the back panel of the module)

See picture above.
Hope this solves a problem for you, without having to invest in additional power connector boards if you don't have that many modules yet.

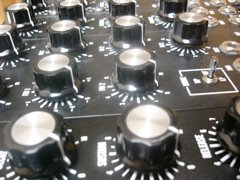
In closing, here is a little pic, that to me shows all the reasons to go for an Analog Modular Synth, knobs, Knobs, Knobs! :-)

Wednesday, May 03, 2006

The first module

As promised I would get back to you on my first module building experience.
Wel, here it is.
To start of with, I ordered a filter and a power supply.
The power supply may not be the most exciting, but without it all you can do with the other modules is tweak knobs and stare at it. (I've done that, and I dreamed up some nice sounds in the process :-) )
I went for the MOTM 950, as it has the capability to supply the newest range of MOTM modules like the 650 midi/cv converter.
As I do not own any old synths that have a CV output, I needed a midi cv too at some point, hence the 950.

The fliter I opted for was the MOTM 420, this filter sounds like the one of the Korg MS-20. That particular synth was the first analog synth I played with in a music store when I was about 13 years old, and have some fond memories to that occasion :-)
Another reason to go with a filter first was that I could use it to patch my other synths through it and therefore use the filter without having to invest in other MOTM modules like VCO's etc first.

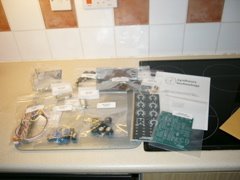
When the shipment arrived it looked like this:
It was well packaged and the whole shipment was undamaged etc. Also here it seems choosing MOTM paid of!


Once unpacked I was left with a selection of bags like this, all parts are packed by type (resistors seperate from semiconductors etc) and a well written manual.


Following the instructions carefully (even if you are an experienced builder, and I was as I used to build and solder together Wersi organs for a while when I worked in a music store years ago, I'd advise you to follow the instructions step by step), the order fo putting things together makes sense and you can't miss anything that way, making the need for trouble shooting easier if at all needed.
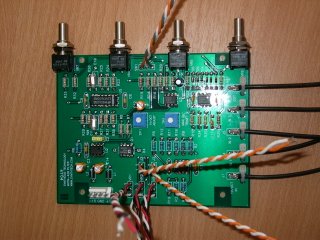
I decided to take my time (and therefore enjoy it a bit longer) the circuit board I ended up with looked like this.


The next day I added the front panel and ended up with my first completed module, a MOTM-420 VCF.


And here it is next to the completed MOTM 950 powersupply, using a set of rackrails by Synthesis Technology.


Until next time!

Tuesday, May 02, 2006

Why MOTM ?

I supose I should answer that question first.

I've been active with synths for several years now, I guess I have about 15 years of synth ownership under my belt, and probably a good 25 years of knowing what a synth is and that I liked the sounds and looks. Fact is, the first synth I saw was an analog modular system on the back of a rather cheezy synth record, the music was not very good, but I knew I wanted one of those synths myself one day. Little did I know that this would be a lot harder to achieve than I thought. They were rare, and very expensive...until now that is. With the relatively recent rise in popularity of the 'analog synth sound' , more and more manufacturers offer analog synths, and as it turns out there are loads of modular systems out there too, quite a few of them are DYI, or offer the option to build your own.
A bit of research showed however that Synthesis Technology offered one of the best products. You get top quality electronics and hardware, a very clear and well documented manual, with very easy to follow build instructions if you decide to go along that path. Patience and a few good tools are all that is needed, but more on that another time.
I also fell in love with the no nonsense look, and the module size. Lusting after the pictures I saw on the Synthtech site, and elsewhere on the web, I made my choice to build my own MOTM synthesizer. While there are manufacturers out there that offer a greater variety in modules, I like the range Synthtech has to offer, and certainly now after having build a few, know that they are of very high quality, and that is always been one of my most important reasons. I want my synth to last a lifetime, and it looks very promising sofar. :-)

So now you know why , the next time I will tell you all about my first MOTM kit building experience.

My signature

K2K Koos, where did I get that from?

Simply, it refers to my other favourite synth, and its a digital one...(my apologies to analog purists out there).

It refers to the Kurzweil K2000 (K2K in short) , in my view still the only digital hardware synth out there that is nearly as flexible as a (semi)modular synth , due to it's fantastic VAST architecture. (okay including it's succesors K2500 2600, 2661, etc)
As I've managed to get others to spend money on a 'second hand' K2K, I suppose I should be branded as K2K Koos.
Mine is second hand too, but it is a fully spec'd K2000R, with 160MB diskdrive, 64MB ram, incl additional sampling board, so it makes it a K2000RS. E-bay is brilliant. :-)
Look forward to Kurzweil format MOTM samples in time :-)

More info see: www.Kurzweilmusicsystems.com

My Synth and Me


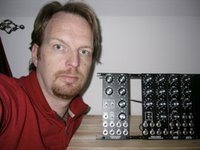
Here is me, with part of my MOTM synth.
The gap visible has since been filled with a MOTM-800 envelope generator (My second).
Currently my synth consists of:
MOTM-300 ultra VCO
MOTM-420 VCF
MOTM-800 ADSR (2x)
MOTM-190 uVCA
MOTM-950 ECC power supply.
Coming soon: MOTM-650 midi-CV interface.

More pics from these modules will follow soon.

Monday, May 01, 2006

Hello everyone

welcome to the MOTM blog.
I have created this blog to let the world know about one of my hobbies, building my very own Analog modular synthesizer.
The one I am building is made by Synthesis technology (see www.synthtech.com) and is called the MOTM system. You could make up many names, but it officially stands for "Mother Of The Modulars".
My own system in a very early state of being build right now, so do not expect a monster synth (yet).
I also want to encourage readers of this blog, to share with me their own MOTM building experience, tips, links, patches, pictures (we love pictures don't we :-) )

Enjoy.